Sunday, January 31, 2016

Photopolymer Stamps Tips, by Maria


Photopolymer Stamps - some tips 

VIDEOS  AT  BOTTOM

Note:  PP = photopolymer

 When PP stamps were first introducted by SU in 2013 no one really knew what they were, including myself . I was a bit skeptical about their ability to stamp a clear image, and to not yellow and crack like clear stamps have done in the past.  But Stampin' Up has found a photopolymer product that meets the high standard of quality that are required for all their products.  Several videos and  video by Stampin' Up helped to explain what they were and clearly outlined the advantages and uses  of  this new member of  SU's stamping family.

I was really skeptical and avoided using them for the longest time.  I had learned how to stamp on wood mounted stamps. Even clear stamps were a source of angst for me. Several of my team stated they "hated" these stamps and wished that SU would discontinue them.

However, with persistence, I began to enjoy stamping with them.  Here are some of the advantages I found with these stamps:

  • They’re entirely transparent for perfect placement every time! This is particularly helpful with alphabets, borders and backgrounds.
  • They are durable. The photopolymer material is designed to last.
  • They stick very well to our clear blocks.
  • They’re age tested. They won’t yellow or cloud up over time.
  • They now come packaged between 2 sheets of acetate in a DVD-sized container.  One sheet is conveniently printed with the stamp images.  
  • They are more environmentally friendly.  Rubber stamps are not made from rubber trees! The photopolymer used to create clear stamps is also a synthetic; but, the solution is reused. For each large sheet of stamps manufactured, up to 70% of the photopolymer solution is reclaimed and collected for additional uses.
    Photopolymer clear stamps can and should last a life time. There is no specific life span on photopolymer clear stamps, with proper use and general cleaning and care they should last as long as traditional rubber stamps.  However, some demonstrators have commented to me that some of their PP stamp sets are showing their age.

     Photopolymer is latex free and contains no ingredients that would be harmful to you or the enviroment.
It took some convincing and persistent use of these stamps, but now I love the Photopolymer stamps. The quality if amazing, and the price is fantastic. 
 
 But some stampers have expressed to me some concerns about the PP stamps - especially the staining of the stamps,,  the problems with getting clear images when stamping, and the aging seen with repeated usage.

Tips on How to Get the Most Out of PP Stamps:

Various sources have been used on tips on how to get the most of these stamps.  I would like to thank Kelly Kent from "My Paper Craft Journey" for a lot of this information, SU, Mary Fish, Amy Koenders, Maggie Matta, Connie Stewart, and various other sources.


Stamping:

A clear or acrylic block must be used, which is sold separately.

Use a foam pad under the stamp in order to get the greatest results and the most detailed images of the PP stamps. This tip came from  Amy Koenders who made a video regarding this.

Apply the stamp to the clear block the same way clear mounted stamps are applied. Place the stamp face down on the work surface,  lowering the block directly on the top of the stamp.  I have noticed that most SU demonstrators in their videos do not mount their PP stamps this way, but I would recommend it. Applying the stamp to the block this way  helps to keep the stamp's intended shape and alignment. When using wood mounted stamps, the stamping is done with the block on top, not underneath.  Note:  use the size of block that is appropriate to the size of the PP stamp.  Too large a block will made stamping difficult as there is too much room around the stamp. Note that wood mounted stamps provide different sizes of blocks for the different sizes of stamps.

Avoid pulling the PP stamp when removing it from the clear block - to avoid stretching or tearing the stamp.  Be gentle.

Cleaning:
Always clean the PP stamps immediately after use - whether you use the stampin' brush, wipes or a special cloth.

One think I avoid doing is cleaning my PP stamps using the SU stamp'n scrub. Unless the scrub is cleaned meticulously everytime I find I am picking up colours from the scrub especially the darker ones.  Don't get me wrong, I like my stamping scrub, but I have my reservations about using it on the PP stamps.  So, I have been using unscented baby wipes, but being environmentally minded,  I have been looking for another method to use.

One person , Maggie Matta uses uses a dampened PVA car cleaning cloth (PVA chamois from car dealerships) ,  These clothes can be cleaned and used over and over again, and can be stored in a clear stamping case.  I personally have not used this cloth, but I am going to try it.  Right now I am using the cloth that comes with glasses.  The cloth is dampened and kept in a stamp case.  So far I am happy with this.

 Never soak or let any of your stamps sit in a solvent or alcohol based cleaner these can break down all types of stamps.

Staining:
PP stamps will  stain if  dark colours – particularly those with red bases (Blackberry Bliss, Cherry Cobbler) are used. To reduce this staining, some stampers believe that if the stamp is first stamped in a lighter colour (like Blushing Bride), this staining will be minimized.

Inks to Use:

Memento ink has been recommended for use with PP stamps.  I have found that Archival ink sticks to the stamp and paper and the stamp is difficult to pull off the paper leaving part of the image behind.

Stazon ink is not recommended by Stampin' Up.  If you do have to use it, ensure that all the cleaner is removed from the stamp prior to storing it.

Cleaning:
One think I avoid doing is cleaning my PP stamps using the SU stamp'n scrub. Unless the scrub is meticulously clean, I find I am picking up colours from the scrub.  Don't get me wrong, I like my stamping scrub, but I find it not suitable for the PP stamps.  So, I have been using unscented baby wipes, but I have been looking for a method to use that is more environmentally friendly.

One person , Maggie Matta uses uses a dampened PVA car cleaning cloth (PVA chamois from car dealerships) ,  These clothes can be cleaned and used over and over again, and can be stored in a clear stamping case.  I personally have not used this cloth, but I am going to try it.  Right now I am using the cloth that comes with glasses.  The cloth is dampened and kept in a stamp case.  So far I am happy with this.

Restoring Tackiness to PP stamps:
There is conflicting information as to how to restore "tackiness" to PP stamps. .Connie Stewart advocates using alcohol wipes to restore stickiness to the PP stamps. She later made a video on using soap and water to restore the tackiness on PP stamps.  I personally have used soap and water and it works very well for me.

Storing:

Store PP stamps away from direct sunlight.

Kate Kalthoff (Stampin to Share) describes a different way to store PP stamps.  Check out her video  This is one method I am going to try.

Some demonstrators actually remove the stamps from the image piece, insert this piece behind the film of the case, and place the stamps directly onto the inside of the case. Mary Fish has done a video describing this method.   If both sides of the case are used, the clear sheet can be used to keep the stamps from touching each other. 


I'm sure there are many other tips to optimize the use of PP stamps.  If you have some, would you please include them in your comments, and I will include them in the article.

Thanks

Maria

 Use Pierce Mat Under Cardstock


Reviving PP Stamps


Move Ink On Too Wet Stamp Pad


Storing Photopolymer Stamps In A Better Way


Wednesday, January 27, 2016

Dawn's Adhesive Video


Posted: 26 Jan 2016 02:43 AM PST
Adhesives from Stampin'Up! Dawn Griffith 
Hi Stampers,
Today's video we will be  talking about  all kinds of Adhesives Stampin'Up! sells .
I will  show you how they work and how I use them . Plus  remember  these adhesives are not only limited to using them as adhesives but also  you may find  them  useful for other  techniques and other fun ways to use.
You may notice I do not talk much about the Crystal Effects  which is also considered an adhesive.  Don't worry we will be using that  product  in tomorrow's video .
2 products that are not adhesive  are also  listed on the Adhesive page in the Annual catalog on page are a must have in my opinion those are 
the Silicone Craft Mat  and Adhesive Remover . Both will be  highlighted in today's video  as well as the following adhesives .
  • Snail Adhesive #104332
  • Snail Refill #104331
  • Fast Fuse Adhesive #129026
  • Fast Fuse refill #129027
  • Fine Tip Glue Pen #138309
  • Mini Glue Dots #103683
  • Stampin Dimensionals #104430
  • Multipurpose Liquid Glue #110755
  • 2-Way Glue Pen #100425
  • Tear & Tape #138995
  • Stampin' Glue Sticks # 130654
Crystal Effects # 101055  ( stay tuned for that video tomorrow )


Dawn's Blog


Bloomin Heart Card, by Patty Bennett


Bloomin' Heart Thinlit Valentine Card

DIY Bloomin' Heart Valentine card featuring Stampin' Up! thinlit, Botanicals vellum (from Sale a Bration), and the Bloomin' Love stamp set heart and banner. Love Blossoms Embellishment kit is the perfect touch for adding a vintage touch to this card by Patty Bennett, pattystamps.com

The amazing and gorgeous Stampin' Up! Bloomin' Heart Thinlit die is so pretty and so versatile!  You can either cut it out and layer it onto your project (see THIS POST) or you can try the technique from my card above... die cut it but leave it in the piece of paper you put through the Big Shot and only push out the little inside detail pieces! (do that with your Big Shot Die Brush).
Find this Bloomin' Heart die on pg 16 in the new 2016 Occasions Catalog, and find the Big Shot Die Brush on page 19.  You can also click on the photos of each product at the bottom of this post to see them online and purchase in my online store.
I think you could use this for a Valentine or an I Love You card.. maybe an anniversary or wedding.. just change out the Friend Greeting to something else!

DIY Bloomin' Heart Valentine card featuring Stampin' Up! thinlit, Botanicals vellum (from Sale a Bration), and the Bloomin' Love stamp set heart and banner. Love Blossoms Embellishment kit is the perfect touch for adding a vintage touch to this card by Patty Bennett, pattystamps.com

Save 15% when you purchase both the Bloomin' Heart thinlit die and the Bloomin' Love stamp set! See it in my online store:  CLICK HERE!
To embellish this pretty heart card, I used some accessories from the Love Blossoms Embellishment Kit #140551, on pg 17 of the 2016 Occasions Catalog.  The pretty glimmery enamel dot flower centers and the pearls are from the kit.

DIY Bloomin' Heart Valentine card featuring Stampin' Up! thinlit, Botanicals vellum (from Sale a Bration), and the Bloomin' Love stamp set heart and banner. Love Blossoms Embellishment kit is the perfect touch for adding a vintage touch to this card by Patty Bennett, pattystamps.com

More noteable design features of this card:
  • die cut the small flowers using printed vellum from the Botanicals vellum stack (FREE Sale a Bration item on pg 4 of the 2016 Sale a Bration brochure) using the small flower dies in the Bloomin' Heart Thinlit die set
  • use a piece of the Botanical Vellum as an overlay to your base card
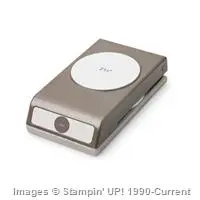
  • Stamp the heart image from Bloomin' Love (pg 17 of the 2016 Occasions catalog) then punch it out with the Sweetheart punch!
  • banner image is stamped with the banner from Bloomin' Love and FRIEND from the Helping Me Grow set, then die cut using the banner die in the Large Numbers framelit die set
  • Fun In Color combo of Tip Top Taupe and Watermelon Wonder


Patty's Blog


Nice Cuppa Tip, by Kimberly


Quick Tip Tuesday

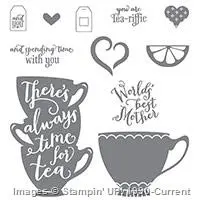
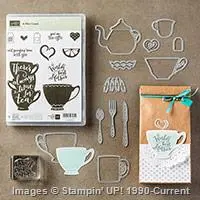
Recently I created a few swaps using the A Nice Cuppa stamp set.

When I’m creating swaps I need the creative process to be fast or else I have the case of the “I’m bored” syndrome that comes on quickly.

When I was creating this project I fell in love with the lemon wedge. I wanted to be able to place the lemon wedge onto the cup, but the thought of cutting these out was daunting.
Then, I had a moment where my brain was working hard and this little Tuesday Tip was born…

Quick Tip Tuesday, A Nice Cuppa, Stampin' Up!

Use the 1-1/4″ Circle Punch to cut your lemon wedge.  Once it’s punched then you can cut straight across the edge for a nice easy cut. BAM! The creative process doesn’t get stuck on the fussy cutting.

Here is the card I created using this quick tip.

Quick Tip Tuesday, A Nice Cuppa, Stampin' Up!

This bright and cheerful card is bound to add a bit of cheer to someones day, don’t you think?

Quick Tip Tuesday, A Nice Cuppa, Stampin' Up! 

While this card has lots of fun layers the creative process is made easy with the quick tip and the framelits for the tea cup.

Tips & Tricks  

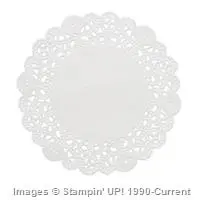
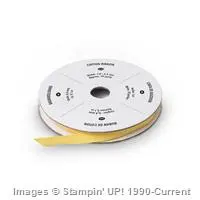
  • Tea Lace Doilies are perfect to embellish a project using this stamp set.  You can see in the photo I have used a doily twice.  One is large in the background, the other is a small piece tucked under the ribbon for added texture for the card.
  • Easily grab ribbons together and staple to a piece of your card front to keep the ribbons from moving around.
Quick Tip Tuesday, A Nice Cuppa, Stampin' Up!

This tea set lends itself to be a big seller because of the versatility.  Between Tea and Coffee, I think I can cover myself for a long time with this set and lots of fun gift ideas.
SAVE MONEY! This stamp set can be purchased as a bundle which means you SAVE money.  15% savings when you purchase the bundle.  That’s a GREAT deal. 
Click the picture below to shop direct in my Online Store.

Quick Tip Tuesday, A Nice Cuppa, Stampin' Up! 

Quick Tip Tuesday, A Nice Cuppa, Stampin' Up!


Kimberley's blog


Sweet Treat Wrap, by Janet Baker, Jessica Wilstead


https://www.youtube.com/watch?v=82n2iCRJbaE


Janet Baker Jessica Wilstead


https://www.youtube.com/channel/UCDZLB0nUIYuPrzZENTxHdgg/feed?activity_view=3


Sunday, January 24, 2016

Coaster Tiles Using "Beau Chateau" DSP, By Jan Farring


December 23, 2011

Tile Coasters - more

I'm addicted to these tile coasters. These are ceramic tiles just for your information (Thanks Jovita!)  You can see my little tutorial here.  After making a couple of sets, I decided to make one for everyone in the family!!  Back to the builders supply for more tiles (16 cents each).
I have to tell a quick story on myself.  I read Melissa's tutorial and she recommended Modge Podge.  So....to the store in our little town - none to be had.  Then I saw on Pinterest that you can make your own, but I didn't have enough white glue, so would have had to go to the store.
Went into my room and guess what was staring me in the face on my shelf??  An unopened bottle of Modge Podge!!  Anyway, from now on, I will look on my OWN shelf before I go to the store!!
I used Beau Chateau Designer Series Paper (122357, page 184) for these tiles 2011

IMG_0379_resize


IMG_0379_resize


Jan Farring's Blog December 2011


Perfect Gift Bags, By Jan Farring


The Perfect Bag - gift bags

Good Morning Everyone
Our club meeting is tonight and I'm going to demonstrate "The Perfect Bag".  These are fun and so easy to make.  Here's what I made yesterday
The Perfect Bag
IMG_0247_resize

I learned how to make these neat bags at the Stampin’ UP Convention in 2008.  Here is a  tutorial for you to be able to recreate your own bags for the holidays.  They are fast and can be made in any size/shape for the perfect gift!

We will start with the largest one made with Holly Berry Specialty Designer Series Paper.

IMG_0230_resize
Supplies:  Holly Berry Specialty Designer Series Paper  (12 x 12) of the same design (124004 Page 20 Holiday Mini Catalog) 
Sticky Strip (104294, page 206)
Crop-A-Dile (108362, page 207)
Brights Glimmer Brads: (121006, page 199)
Simply Scored Scoring Tool (122334, page 7 Holiday Mini) 
Score both sheets of 12 x 12 designer paper at 2" on three sides and 1 1/2" on the top side.

IMG_0212_resize

Fold and crease the top 1 1/2" of both 12 x 12 sheets to the front side of your designer series and adhere with snail

IMG_0215_resize

Crease all score lines.

IMG_0216_resize
 
Add sticky tape on one 2” side as below

IMG_0219_resize 
Adhere both pieces together on this side

IMG_0220_resize

 Add sticky strip on other side - making sure your seams are facing the same direction (back of box)

IMG_0221_resize

You now have a box like this

 IMG_0222_resize

Turn it bottom side up and fold in both sides (as if folding a gift package)  Line up the “seams” with the 2” fold.

IMG_0224_resize

Place Sticky Strip on each one side and fold over – reaching down inside bag to adhere bottom pieces together.  The bottom of your box should look like this

IMG_0227_resize

Cut 2 11” x 1” pieces of Real Red Card Stock and 2 – 11” x ¾” pieces of designer paper.  Adhere these together and using the Crop-A-Dial punch 2 - 1/8” holes and apply handles with Red Glimmer Brads.
 IMG_0228_resize

I added some Real Red 5/8” Satin Ribbon and a tag

IMG_0231_resize
Add some tissue paper and you have your Perfect Bag
 Here are some other dimensions 
I used Letters to Santa (122349, page 186) designer series paper and cut two sheets 9 x 7 (first measurement will always be horizontal).  Score all 4 sides at 1".  Finished measurement is 7" x 5" x 1".  Excellent for small photo albums, card sets…..

IMG_0242_resize
I used Beau Chateau designer series paper (122357, page 184) and cut two sheets 9" x 9".  Score all four sides at 1". Finished measurements are 7" x 7" x 1".   Excellent for CD sets and definitely not limited to the Holidays

IMG_0243_resize
 

And a small one for those small, fun gifts.  I used Frostwood Lodge (124002, page 28 Holiday Mini)  designer series paper and cut two sheets 8" x 5". Score three sides 1 1/2" and top side 1".  Finished measurements of bag are 5" x 3 1/2" x 1 1/2".  Perfect for small gifts.

IMG_0244_resize
 

You can increase the width of the bag by 1/2" by adding 1" to the horizontal measurements and scoring at 1 1/2" instead of 1". 


Jan Farring's Blog