Sunday, February 21, 2016

Crepe Paper Flower (using Filter Paper - Maria calls it Crepe Paper) Tutorial, by Maria


Best Mother Ever - SUO Challenge #142

Sale-a-bration (SAB) is moving along at a very rapid pace.  The challenge this week is to create something using SAB products.  Since Mother's Day will be upon us before we know it, I thought I would use one of the stamps to make a Mother's Day card.

 
The products I used:  "What I Love", Botanical Garden Vellum, and Metallic Tape

The flowers were made using the following 3 colours:  Pink Pirouette, Blushing Bride, and Rose Red.  They were then cut out, the edges sponged with Rose Red ink, and mounted using a dimensional to a 2 1/2" Whisper white circle.  The bird builder punch was used to punch out leaves/branches.  They were sponged with Old Artichoke ink before adhering them to the bottom of the flowers.

The base card is top folded Rose Red cardstock, layered with Whisper White cardstock embossed with the butterfly embossing folder,.  After attaching this embossed layer to the card front, it was lightly brushed with Rose Red ink.  A layer of Botanical Garden Vellum was adhered to the bottom half.  A piece of Metallic Tape was placed at the top end of the vellum layer.


A piece of Rose Red card stock was die cut using the Apothecary die framelet.  The circle was adhered partly over this die cut piece.

Some small flowers were die cut using the metallic tape and added to the middle of each flower, followed by a rhinestone.


Three more small flowers were die cut from the vellum and adhered to the lower right corner of the card.  Rhinestones were added.

Supplies Used:
Stamps: What I Love, And Many More
Inks: Pink Pirouette, Blushing Bride, Rose Red, Always Artichoke
Papers: Rose Red, Whisper White, Botanical Garden vellum, Old Olive
Accessories: 2 1/2" circle punch, Word Window punch, Modern Word Label punch, Bird Builder Punch, small flowers (from accessory pack), rhinestones, metallic tape, Butterfly embossing folder, Apothecary die/framelit.


https://www.youtube.com/watch?v=3YD-8dQBBPA


Image result for Stampin Up Blossom Petal Punch

 Blossom Petal Punch

Maria's Blog


Monday, February 15, 2016

One Sheet Wonder from Angie, of ChicNScratch


One Sheet Wonder Featuring Party Wishes by Stampin’ Up!

OneSheetWonder7a
 

Today I'm sharing my One Sheet Wonder Class - Featuring the Party Wishes Stamp Set featured on page 5 of the Occasions Catalog.

This One Sheet Wonder Class is the 7th in my series and in this video we'll be making 12 cards and a box out of one piece of the It's My Party Designer Series Paper.


osw7boxa


I cover the cutting instructions in the video and here's a picture of my template.

One Sheet Wonder Class 7
osw7carda


Here's a video on our One Sheet Wonder Class... CLICK HERE to watch the video on my Chic n Scratch website.


 https://www.youtube.com/watch?v=8-5H2uoT2lc


Click here to download the Instructions


CUTTING INSTRUCTIONS
(Please read instructions all the way through before you
begin.)
1. Cut your 12 x 12 sheet of It’s My Party Designer Series Paper at 4”, set aside for 5 cards, take remaining piece and cut at 4” again ... leaving you with another piece that measures 4 x 12. Set aside two pieces that measure 4 x 12 to cut for cards.
2. Take the last piece of 4 x 12 paper and cut at 4-1/4 x 1-1/2, you need three pieces for the box. Cut again at 1-1/2 and cut it to measure 1-1/2 x 1-1/2, you need two pieces. Cut the remaining DSP to measure 4 x 2-1/4 and you’ll get two pieces.
3. Take the two pieces that measure 4 x 12 and cut them to measure 4 x 2-1/4, you’ll get five per strip giving you a total of ten.
4. You’ve finished cutting the Designers Series Paper.
5. Cut your Mini Macaron card stock for the cards. Cut six sheets on the
portrait side at 4-1/4 and score @ 5-1/2 for a total of 12 cards.
6. Cut two sheets of Whisper White card stock to measure 4-1/4 x 2-1/2, you
need 12 and you can get 8 per sheet.
7.To assemble your cards - Add the DSP (4 x 2-1/4) to the Whisper White Card Stock (4-1/4 x 2-1/2). Punch hole on left side for ribbon. Add Ribbon and place adhesive on the back and add to card front.
8. Stamp image with Mint Macaron ink on Whisper White card stock and set
aside to dry completely. Once it’s dry rub the embossing buddy over the top,
stamp image with Versamark, sprinkle on Embossing Powder, shake off extra and heat set it.
9. Once it’s cool, cut it out with the 2” Circle Punch. Add it with Glue Dots to a 2-3/8 Scallop Circle cut out of the Dazzling Diamonds Glimmer Paper.
10. Add to front of card with Dimensionals.
11. If you want to decorate the inside: Take a 5 x 3-3/4 sheet of Whisper White card stock and stamp Happy Birthday with Mint Macaron ink in the center.  Stamp balloon on scrap paper and cut out with Balloon Punch. Stamp balloon string and then add balloon with a Dimensional or a Glue Dot.
"Stampin' Up!" Supplies:
  • Stamps: Party Wishes 140651 (w) 140961 (c) 
  • Ink: Mint Macaron 138326, Versamark 102283 
  • Card Stock: Mint Macaron 138337, Whisper White 100730, It’s My Party Designer Series Paper 140552, Dazzling Diamonds Glimmer Paper 135315 
  • Accessories: Stampin Trimmer 126889, Scoring Tool 122334, 2” Circle Punch 133782, 2-3/8 Scallop Circle Punch 118874,  Bone Folder 102300, Project Life Corner Punch 135346, Rhinestones 119246, Dimensionals 104430, Glue Dots 103683, White Stitched Ribbon 138429, Heat Tool 129053l, Embossing Buddy 103083, White Embossing Powder 102132, 1/8 Circle Punch 140972, Party Punch Pack 140608, Paper Piercer 126189, Fast Fuse 129026


- See more at: http://mychicnscratch.com/2016/02/one-sheet-wonder-featuring-party-wishes-by-stampin-up.html#sthash.7kMxZxNx.dpuf


Angie's Blog


Wednesday, February 10, 2016

Masking Technique video, by Dawn Griffith


Masking Technique video

My Heart Smiles cards Dawn Griffith Stampin'Up!Hi Stampers,
Today we will be making this card . We will be doing the Masking Technique .
This Technique has been around and I have done a few video on this technique BUT I have had many requests  to make a video on this card I posted HERE.
I Love the fine lines of the Flowering Fields stamp set which you can get for FREE until March 31, 2016  with Sale-a-Bration HERE .
We will be making the Tip Top Taupe version but  I thought I would make a Pool Party version  just so I could use the beautiful Pool Party Glitter ribbon #140561
All items used are listed below for  quick click details.
  • Occasions catalog click HERE 
- See more at: http://www.dawnsstampingthoughts.net/2016/02/masking-technique-video-.html?utm_source=feedburner&utm_medium=email&utm_campaign=Feed%3A+typepad%2FcauJ+%28Dawns+Stamping+Thoughts%29#sthash.1XzCWWmB.dpuf
Masking Technique video


My Heart Smiles cards Dawn Griffith Stampin'Up!

Today we will be making this card . We will be doing the Masking Technique .

This Technique has been around and I have done a few video on this technique BUT I have had many requests  to make a video on this card I posted HERE.  Details of Card...

I made this simple card  over the weekend  I used

Lost Lagoon card stock
    cut at 4 1/4" x 5 1/2"
    cut at  4" x 5 1/4"

Basic Black card stock #121045
    cut at 4 1/8" x  5 3/8"
    cut at  3 1/4" x 3 3/4"

Whisper White card stock # 100730
    cut at 3" x 3 1/2"

I used the Sale-a-Bration stamp set called Flowering Fields
    (w)# 141300
    (c) # 141303

Which you can get this stamp set  for FREE  until March 31, 2016

I highlighted the flower with the White Gel Pen #105021

The sweet greetings is from the stamp set Suite Sayings
    (w)# 140709
    (c)# 140712

I used the Square Framelits #130911 and  cut out a template for the masking technique  and  used my Sponge Daubers# 133773 to  add the Lost lagoon classic ink# 133644  inside the mask  then stamped the  greeting and the flower with the Basic  Black Archival ink # 140931.

 I finished the card with a  bow using the Whisper White 5/8" Satin ribbon #134549. I attached the bow with a Mini Glue Dot # 103683.


For the background I used the Perfect Polka Dots embossing folder which is no longer available .
- See more at: http://www.dawnsstampingthoughts.net/2016/02/my-heart-smiles-.html#sthash.RYafJyz1.dpuf


I Love the fine lines of the Flowering Fields stamp set which you can get for FREE until March 31, 2016  with Sale-a-Bration HERE .

We will be making the Tip Top Taupe version but  I thought I would make a Pool Party version  just so I could use the beautiful Pool Party Glitter ribbon #140561

All items used are listed below for quick click details.

    Occasions catalog click HERE


Monday, February 8, 2016

Hello My Friend, by Maria VanDerform


Hello My Friend


The card base is Melon Mambo, layered with Whisper White, and then Perfectly Artistic DSP which I stamped all over with a small flower from "Hello" and Melon Mambo ink. 

Using the circles framelit, a large circle was die cut using the "Color Me Irrestibably" DSP with the pattern of the rain drops in it.  A sponge was used to apply a bit of Pink Pirouette, and a bit of Melon Mambo in a random pattern on this circle.


On a small Whisper White rectangle, the word "Hello" was stamped using Black Memento ink.  A flower was stamped using Melon Mambo ink just above the word on the right. Melon Mambe was used to sponge the edges.  This was adhered to the circle using dimensionals.  Then below the circle the rest of the sentiment "My Friend" was stamped .

On a separate piece of Whisper White cardstock, two flowers and two leaf stems were stamped - the flowers using 3 step stamping.  The colors, in order of usage, Pink Pirouette, Blushing Bride, and Melon Mambo.  The middle of each flower was stamped with Melon Mambo.  Old Olive was used to stamp the leaf stems.  The flowers and leaves were cut out by hand.

One flower was adhered directly to the card front at the edge of the circle at the lower right.  A green leaf was attached to the flower before it was glued down.  The second flower was added using dimensionals, and the accompanying leaf attached to the card front.

Wink of Stella (clear) was applied to the flower centers.

Supplies Used:

Stamps: What I Love, Hello
Inks: Black Memento, Pink Pirouette, Blushing Bride, Melon Mambo, Old Olive
Papers: Melon Mambo, Whisper White, Perfectly Artistic DSP, Color Me Irrestiably DSP
Accessories: Circles framelits, dimensionals, Wink of Stella glitter brush (clear)

Maria's Blog


Puppy Love, by Kimberly


Puppy Love :-)

 Hello Friends!

I decided to join in on the Splitcoaststampers Cards for A Cause this year and the February Challenge is to send cards to the Tri-County Humane Society in St. Cloud, MN (see details here).

I knew that the Puppy Love set from Sweet ‘n Sassy Stamps would be perfect for this cause and I also noticed that this week, The Paper Players PP281 Theme Challenge is “Raining Cats and Dogs” :-)

I have also linked this card to the Splitcoaststampers’ CC565 Color Challenge and the SC578 Sketch Challenge.

I hope you will find time to visit the above galleries and if you are inclined to do so, come join in on the Cards for A Cause card drive (this is a monthly card drive with a different cause each month- last year Splitcoaststampers sent over 6300+ cards to worthy causes- wow, what an honor to be part of that this year :-)).

To create this card:

Ink the Scottish Terrior dog image and the sentiment from the Puppy Love clear stamp set from Sweet ‘n Sassy Stamps (SNSS) using Stampin’ Up! Black Archival Ink and stamp onto Whisper White cardstock (I used my MISTI® Tool for alignment and repeated stamping to get the images nice and dark and I also used the Heat Tool to speed up the drying time for the multiple layers of ink).

Add a few paw prints from the Puppy Love set using Smoky Slate Classic Ink, trim the panel and use a sewing machine with a zig zag stitch to adhere it to a piece of Basic Black cardstock.

Emboss a piece of Real Red designer paper (retired years ago from a Stampin’ Up! hostess pack), adhere to Basic Black cardstock using the zig zag stitch as well.

Layer the background panel onto Real Red cardstock, add the panel onto the Whisper White card base and mount the horizontal embossed/ stitched panel directly to the card front.

Stitch two flag banners to the upper left corner with a straight stitch and mount the focal image panel with dimensional foam to finish off the card.

Fun and quick- this card should be flat enough to mail without additional postage.
Puppy Love 

Stamp Sets:  Puppy Love (SNSS)

Ink: Black Archival (Stampin’ Up!)

Paper: Whisper White, Basic Black, retired Real Red DSP (Stampin’ Up! hostess level I set)

Accessories:  MISTI® Tool, Big Shot™, Sizzix Plaid  and DiamondsTextured Impressions™ Embossing Folders,  Sewing Machine, White Thread, Hexagon Punch


Friday, February 5, 2016


Posted: 04 Feb 2016 02:47 AM PST

Mini Magazine Holder for stampers club hostess  Dawn Griffith Botanical  Builder framelits Stampin' Up! Occasions catalog 2016 
Hi Stampers,
Today we will be making this  adorable mini magazine holder  which will hold 5  cards with envelopes.
 This was my hostess gift for my club hostess this past Saturday night.
Big thanks to Dee Slater for her cute idea which worked perfectly for the  hostess cards  .
Today we will be making the cute holder .
We will be using the Botanical Gardens designer paper # 140583
with Cajun Craze 12" x 12" card stock /Regal Collection  12" x 12" # 131188
  • cut at 9" x 12"
Here are the measurements of the  front  layers  to decorate the holder .
Hello Honey card stock # 133678
  • cut (2) at 2" x 4 1/4"
  • cut (2) at 1 1/2" x 2" 
Whisper White card stock # 100730 
  • cut (2) at 1 7/8" x 4 3/8"
  • cut (2) at 1 3/8" x 1 7/8"
Botanicals Gardens designer paper # 140583
  • cut (2) at 1 3/4" x 4 1/4"
  • cut (2) at 1 1/4" x 1 3/4"
I used the Botanical Builder Framelits  on the cards  and also on the front of  my holder.
You  can get all (3) items in a bundle and save 15% #140819
  • Plus this bundle would qualify you for a Sale-a-Bration items for FREE 
The bundle  includes 3 items  listed below  
  • Botanical Builder Framelits 
  • Botanical Garden Designer paper
  • Botanical Blooms stamp set  .
The stamp set used  for the front of the cards is from Blessed by God
  • (w)# 134297
  • (c)# 134300
Thanks for peeking in today .


image from https://s3.amazonaws.com/feather-client-files-aviary-prod-us-east-1/2016-02-02/f3b95936240e40f083593ccd0f6d7491.png


Wednesday, February 3, 2016

Birthday Card, by Julie Gearingewr


It’s time for the SUO141 “Happy Birthday” Challenge and I decided to create a Clean and Layered (CAL) card using the Create with Connieand Mary CCMC391 Sketch Challenge along with the FUSION “Woodgrain Neutral” Inspiration Photo Challenge (I was inspired by the blue and white along with the neutral colors :-)).

I hope you will have a chance to check out my sister Design Team member samples at the SU-Only Challenge site as well as the fantastic Design Team samples at the other two challenge sites- gorgeous inspiration from all!

To create this card:

Use the Big Shot™ with the Zig Zag Textured Impressions™ Embossing Folder to emboss a piece of Tip Top Taupe cardstock.

Trim the embossed panel and mount onto Whisper White cardstock, trim again and mount onto the Night of Navy card base.

Stamp the sentiment from Rose Wonder using Night of Navy Classic Ink onto Whisper White cardstock, trim and create a banner using the Hexagon Punch.

Add a strip of Night of Navy cardstock to the card base, adhere the loops of Gold Thread and mount the sentiment using Stampin’ Dimensionals®.

De-static a piece of Vellum with the Embossing Buddy®, ink the floral stamp from Flower Shop and the branch image from Choose Happiness using Versamark™ Ink and stamp three of the floral images and two of the branches onto the vellum.

Apply White Stampin’ Emboss® Embossing Powder and heat set with the Heat Tool. 
Color the images using Stampin' Write Markers- Marina Mist for the flowers and Wild Wasabi for the leaves.

Wipe off the excess ink from the embossing and carefully fussy cut the images.

Mount the leaves and flowers to the card front, add the Early Espresso buttons (with Night of Navy strips as “thread”) to finish off the card. 

Stamp Sets:  Rose Wonder, Flower Shop, Choose Happiness

Ink:  Versamark™, Night of Navy; Stampin' Write Markers- Marina Mist and Wild Wasabi
Paper/Cardstock: Whisper White, Night of Navy, Tip Top Taupe
Accessories: Big Shot™, Zig Zag Textured Impressions™ Embossing Folder, Embossing Buddy®, Stampin’ Emboss® White Embossing Powder, Heat Tool, Hexagon Punch, Gold Thread, retired Early Espresso buttons


Julie's Blog


Tip of The Week by Kimberly


Quick Tip Tuesday

Okay… Ribbon is by far one of my favorite embellishments to add to a project.  I’m always looking for a different spin to adding ribbon to projects instead of the standard bow.

It’s funny to look back through my blog and see the different ways I’ve used ribbon on cards and the cycle of trends I’ve gone through.  Have you noticed this with your own cards?

Today’s quick tip is easy and fun. I’m using one of my favorite ribbons- Seam Binding.


Why Seam Binding?

It’s the most forgiving ribbon I’ve found.  It not only ties a beautiful bow, but it also lays flat after you layer it.
Here is how I love to layer ribbon to give the appearance of a classy banner.
Honeycomb Happiness, Stampin' Up!
The ribbon stays in place with a simple staple in the center.  Notice how flat the ribbon lays down, too?
Now let’s see how this looks on a completed project.

Honeycomb Happiness

Honeycomb Happiness, Stampin' Up!

The Honeycomb Happiness stamp set is a FREE Sale-a-Bration stamp set when you purchase $50 with any order.  This set is perfect if you love to watercolor, and great for a beginner watercolor enthusiast.

Tips & Tricks

  • I started with a piece of Watercolor Paper and stamped the chic using Archival Basic Black ink.
  • Use an Aqua Painter to color the image with our Classic Ink Pads.  I watercolor around the outside edges first starting with  light color then gradually adding darker color as the water absorbs into the Watercolor Paper.  I used Hello Honey Classic Ink to color this chic.  The feet and beak were colored using Tangerine Tango.  It’s a brighter orange and perfect to add a little pop of color to this card.
  • It’s My Party Designer Series Paper has a perfect pattern that mimics chicken feet and perfect to coordinate with this stamp set.
Honeycomb Happiness, Stampin' Up!
The banner with the greeting was added over the chic image using a dimensional.
Honeycomb Happiness, Stampin' Up!
While there are hundreds of ways to use ribbon, I hope you will try this quick tip on your next project.  It’s simple enough not too bulky for the postmaster to get grouchy.
Honeycomb Happiness, Stampin' Up!
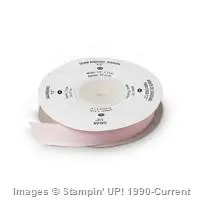
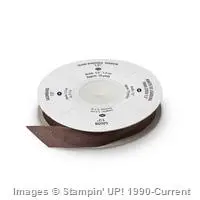
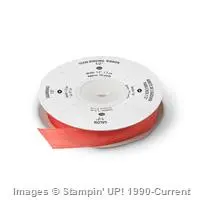
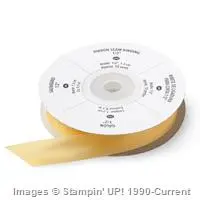
Below are the Seam Binding spools Stampin’ Up! has available.   This is a ribbon I love to always have on hand.


Kim's Blog


Birthday Card by Angie


Birthday Blooms Birthday Card

Birthday Blooms Birthday Card
 birthdaybloomsbirthdaycardb
My card today is using one of my favorite stamp sets in the Occasions Catalog.  It's the Birthday Blooms Stamp Set on page 9.
This card is also the birthday card I sent to my downline (Chics Paper Ink) if they have a birthday in the month of February.  I'm happy to say I made all the cards this month too!!
They were made with our awesome Note Cards and here's a video on how to make the Birthday Blooms Birthday Card.
Click here to view the video if you're reading this in your inbox (email).
Click here to download the Instructions.
Stampin' Up! Supplies:
- See more at: http://mychicnscratch.com/2016/02/birthday-blooms-birthday-card.html#sthash.SjwiZ5ez.dpuf

Birthday Blooms Birthday Card

Birthday Blooms Birthday Card
 birthdaybloomsbirthdaycardb
My card today is using one of my favorite stamp sets in the Occasions Catalog.  It's the Birthday Blooms Stamp Set on page 9.
This card is also the birthday card I sent to my downline (Chics Paper Ink) if they have a birthday in the month of February.  I'm happy to say I made all the cards this month too!!
They were made with our awesome Note Cards and here's a video on how to make the Birthday Blooms Birthday Card.
Click here to view the video if you're reading this in your inbox (email).
Click here to download the Instructions.
Stampin' Up! Supplies:
- See more at: http://mychicnscratch.com/2016/02/birthday-blooms-birthday-card.html#sthash.SjwiZ5ez.dpuf
Birthday Blooms Birthday Card


My card today is using one of my favorite stamp sets in the Occasions Catalog.  It's the Birthday Blooms Stamp Set on page 9.

This card is also the birthday card I sent to my downline (Chics Paper Ink) if they have a birthday in the month of February.  I'm happy to say I made all the cards this month too!! 

They were made with our awesome Note Cards and here's a video on how to make the Birthday Blooms Birthday Card.


Stampin' Up! Supplies:

    Stamps:  Birthday Blooms Clear-Mount Stamp Set - 140658, Birthday Blooms Wood-Mount Stamp Set - 140655, And Many More Clear-Mount Stamp Set - 134276, And Many More Wood-Mount Stamp Set - 134273
    Ink:  Soft Sky Classic Stampin' Pad - 131181, Wild Wasabi Classic Stampin' Pad - 126959
    Jet Black Stazon Pad - 101406, Tuxedo Black Memento Ink Pad - 132708
    Paper:  Whisper White Note Cards & Envelopes - 131527, Whisper White 8-1/2" X 11" Thick Cardstock - 140272, Whisper White 8-1/2" X 11" Cardstock - 100730, Soft Sky 8-1/2" X 11" Cardstock - 131203
    Accessories:  Aqua Painters - 103954, Paper-Piercing Tool - 126189, Rhinestone Basic Jewels - 119246, Stampin' Dimensionals - 104430


Angie's Blog


Water Colored Card, by Maria Vanderform


Rose Wonder Watercolored Birthday Card

Yesterday I played with the Rose Wonder stamp and coordinating thinlet dies and made it into a birthday card.


I used the thinlet die of the large rose and die cut the image using gold foil paper.  The resulting die cut was then adhered to a piece of 5 by 3 3/4" piece of Watercolor paper.

Then using reinkers and an Aqua painter filled with water, I colored the rose.  The colors I used:  Rose Red, Claypso Coral, Pink Pirouette for the flower, Pear Pizzazz, Mossy Meadow for the leaves. A small amount of these reinkers were placed in a paint palette.

I began by applying a generous amount of water to a small area of the flower using the Aqua painter.  Then, again, using the aqua painter, a small amount of the Pink Pirouette reinker was picked up and applied very lightly to the wet surface, letting the water spread the color.  To darken certain areas, I applied Calypso coral or Rose Red reinker using the same method.  I made the center of the rose darker than the outer petals.  After the ink was dry I brushed on Wink of Stella glitter.


The leaves were colored the same way.  After water was applied with the brush, some Pear Pizzazz was dropped onto the leaves, and Mossy Meadow applied to darken certain areas.


The watercoloured image was allowed to dry overnight, and then I cut the image out, and adhered it to a piece of Whisper White cardstock.  This was layered with Sahara Sand cardstock, and then the Rose Red base.

The sentiment was stamped embossed with gold embossing powder, trimmed down, the corners rounded with the corner rounder punch, and layered with gold foil paper.  It was adhered to the top part of the card.  Some tiny flowers were punched from the left over gold foil paper and added to the card front. Rhinestones were placed in the center of the flowers.

The number "40" was die cut was a retired alphabet die set using Rose Red paper.  Gold Wink of Stella glimmer was applied to this after it was attached to the card front.


Maria's Blog


Tuesday, February 2, 2016

By The Time, by Julie Gearinger


To create this card:

Ink the script stamp from By the Tide (Stampin’ Up!) with Pink Pirouette Classic Ink and stamp repeatedly onto a piece of Whisper White cardstock.
 

Ink the coral image using Tip Top Taupe Classic Ink and stamp into the corner of the panel, clean the stamp and ink the coral image again with Watermelon Wonder Classic Ink, stamp off onto a scrap piece of paper, stamp onto the panel and repeat with the coral image using Watermelon Wonder Classic Ink.

Ink the Nantucket image using Tip Top Taupe Classic Ink , ink the sentiment from Blessed (Mama Elephant) using Memento™ Tuxedo Black Ink and stamp onto the panel (I used my MISTI® Tool to position and stamp this image).

Trim the stamped panel and mount onto Pink Pirouette cardstock.
Trim a piece of Whisper White cardstock for the background panel, mount onto Pink Pirouette cardstock and mount onto the Tip Top Taupe card base.

It is difficult to see the beautiful sheen from the Wink of Stella
Ink the fish and seahorse images using Stāz-On® Jet Black Ink and stamp onto Whisper White cardstock.

Color the images with the AquaPainter™ and ink from the Pink Pirouette, Watermelon Wonder and Tip Top Taupe Classic Ink pads.
Fussy cut each image, add a bit of Clear Wink of Stella™ and mount the fussy cut images onto the stamped panel using Stampin’ Dimensionals®.

Add the focal image panel to the card front to finish off the card using Stampin’ Dimensionals® to finish off the card.

Stamp Sets:  By the Tide (Stampin’ Up!), Blessed (Mama Elephant)

Ink: Stāz-On® Jet Black, Memento™ Tuxedo Black, Pink Pirouette, Watermelon Wonder, Tip Top Taupe

Paper: Whisper White, Pink Pirouette, Tip Top Taupe

Accessories: Clear Wink of Stella™, MISTI® Too, Stampin’ Dimensionals®


Julie's Blog